 kali@luxury-paper-box.com
How To Design Packaging Box in Illustrator?
In marketing, if there is one element that is not trivial, it is the packaging. A true extension of your brand, it protects while being a tool of seduction. You have fully designed your product, why not go further by designing its packaging? Many packaging design softwares allow you to play graphic designers at a lower cost. Here, let’s discover together how to create paper box packaging with Illustrator for an equally professional rendering step by step.
Why Design Your Unique Packaging Box?
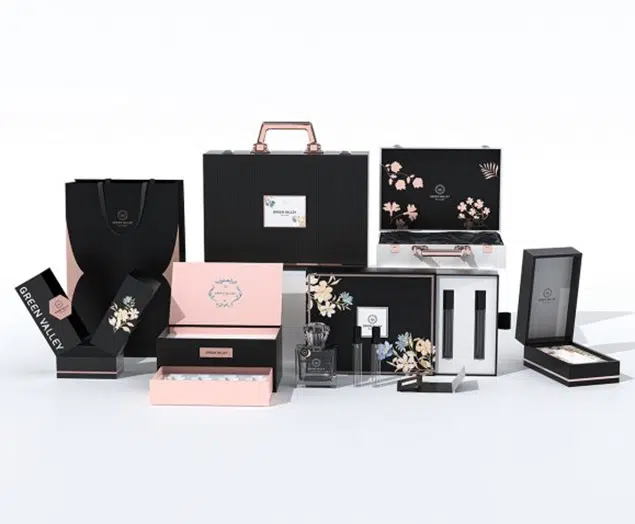
The packaging is above all a practical tool. It allows your product to reach its various outlets safely. In addition, it sneaks up to the emotional dimension of the buyer. It carries with it the entire history of your brand and your product to stimulate the desire to buy. Custom packaging box, therefore, takes on a promotional and persuasive function capable of expressing the quality and characteristics of a product to capture the customer’s attention and induce him to purchase.
A real asset in the race for distinction, packaging often makes the difference between two similar products. The packaging can be compared to a kind of dress: the more original and inviting it is, the more it will be able to attract attention, exactly like a dress during a fashion show and for this, it can play a decisive role in bringing success or failure to market a particular product. In short, product paper packaging an essential element to developing with the utmost care for a message faithful to the product!
Why Use Illustrator To Design Packaging Box?
Before you start designing your package, you need to carefully consider which program is best for the job. Most packaging designers will send their 2D works to the manufacturer in a vector format. Vector files are scalable and it’s easy to create dieline templates using the line and shape tools in vector programs like Adobe Illustrator. In the DTP (Desktop publishing) and graphic design, Adobe Illustrator is one of the best software for creating vector images, a valuable tool with many advantages:
- Zero pixelation: Your images stay perfectly sharp even zoomed in at the maximum.
- Wide variety of options: Free drawing, defined shapes, fillings or shading for an infinite number of creations.
- Drawing in perspective: Create and modulate your 3D models for a fair look at the perspective in the blink of an eye.
In other words, Illustrator is the promise of a rich achievement that will look like you. Complex in appearance, while its use is rather simple for those who dare to launch. So let your imagination run wild and use your skills as a graphic designer for too long to be ignored!
How To Create & Design Packaging Boxes With Illustrator By Yourself?
Well, after this very brief introduction on the importance of packaging and the advantages of Illustrator, let’s move on to the gist of this article. Follow the below steps, you will learn how to design professional packaging with Illustrator. We will also go over the tools and techniques to design precise packages in Adobe Illustrator and avoid errors that can compromise the final result.
Step 1 – Designing The Basic Shape
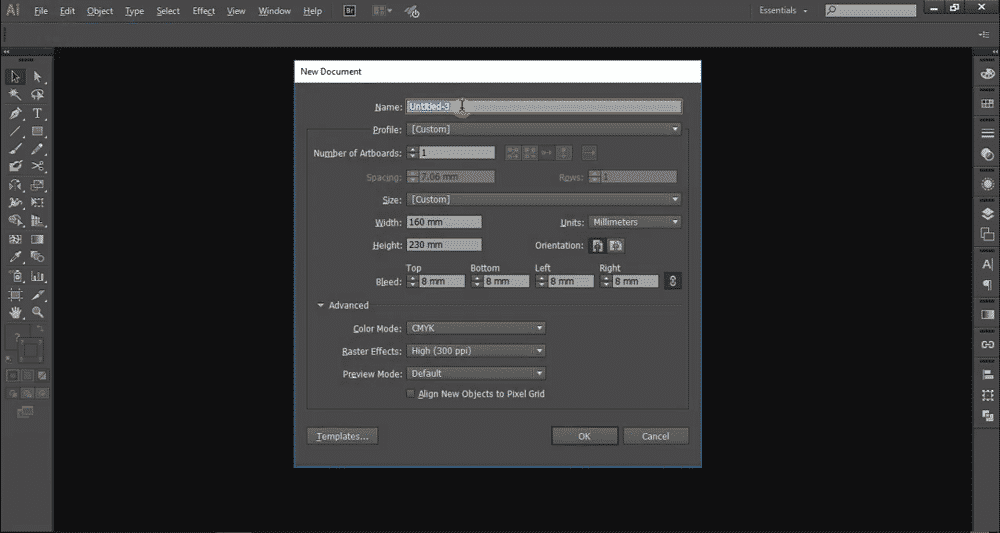
- Create A New Document
To create your packaging on Illustrator, launch the software and click “File” and “New Document.” Define its name, size, orientation, select “Print” in the “Profile” section and validate.
- Draw Shape
Check in “Show” that “Reviewed Spots” is well checked for modulation ease. In the same way, make the “Transform” box appear in the “Window” menu. Ready to start?
- From the shape creation tool in the left vertical menu, draw the first shape. We’ll go here on a simple rectangle.
- Duplicate the shape as many times as necessary (alt-shift on the keyboard) to create the body of the packaging. Each facet created can be modified independently, especially in terms of its dimensions.
Tip: The reference point in the “Transform” box allows you to change only some shapes at the expense of others.
- Develop Tabs
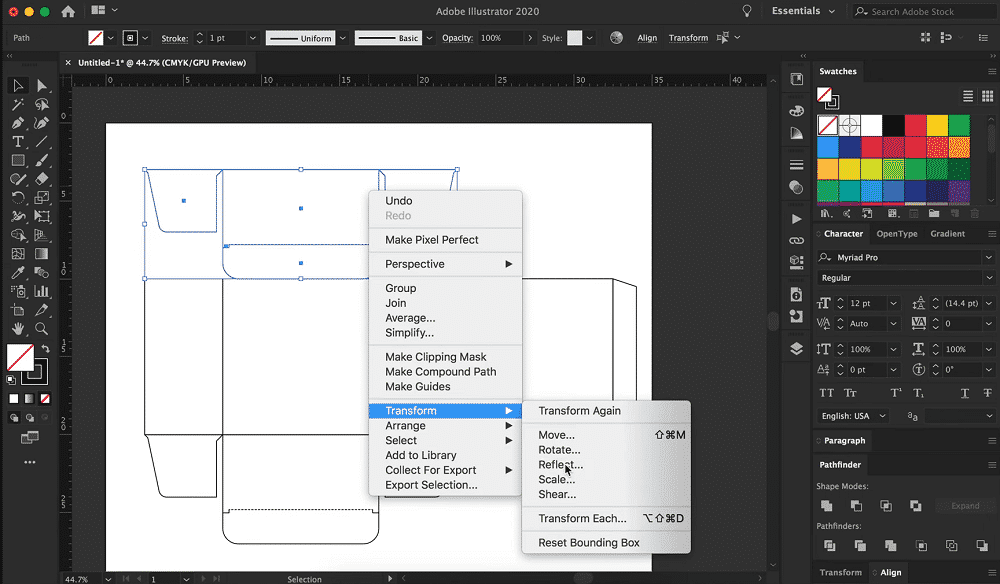
With the previously used form creation tool, draw a new rectangle of the same width above the first. Block the lower reference point in the middle to work only on this new side and change the height.
After that, you’ll create as many tabs as you need to drag with the mouse. You’ll put the bottom ones in the right direction by right-clicking, then “Mirror” and “Horizontal.” Your packaging is already starting to take shape!
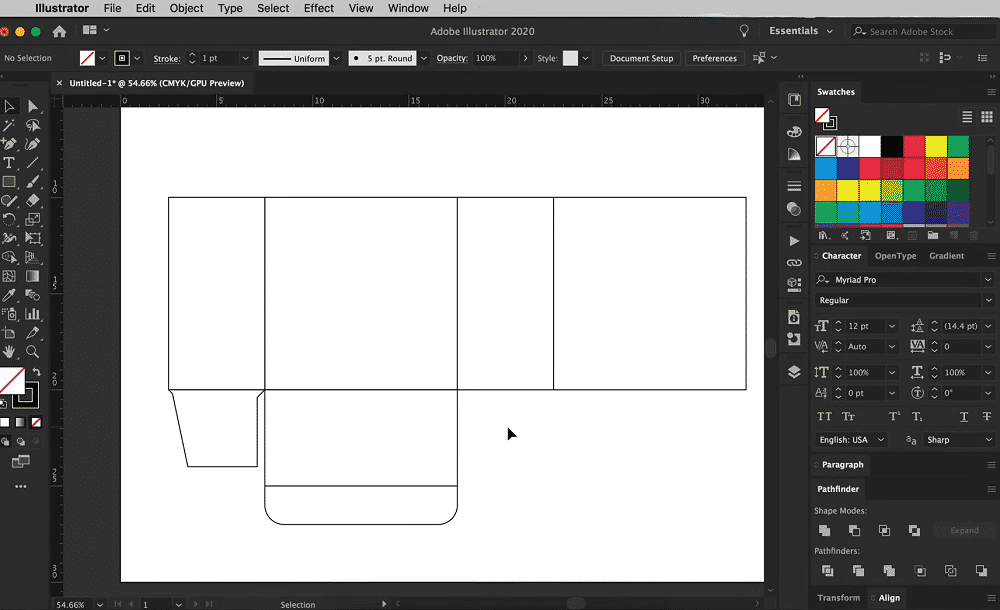
- Refine The Shape of Tabs
- Keep in mind that folding requires different-shaped tabs. That’s why you’ll take care to work on everyone’s appearance.
- Face and back tabs: Overlay two rectangles of different sizes. Select them and choose “Shape Designer” from the left tool menu. The boundaries fade to make way for a well-drawn tab.
- Side tabs: Create a horizontal marker 5 mm or more from the bottom line of your rectangle.
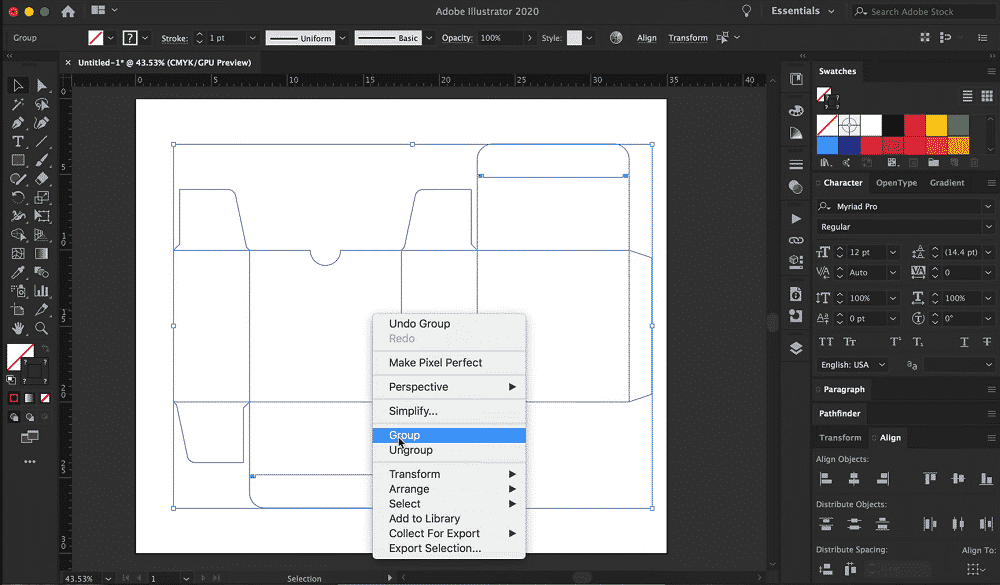
Tip: Always be sure to select the area you’re working on with the black cursor on the toolbar.
- In the left toolbar, select “Feather – Anchor Point.” Click on the two intersection points between the marker and the sides of the rectangle to block the dots.
- Finally, with the white cursor on the toolbar, click on the top left corner of your rectangle. Then click on the recently created left anchor point.
- Hold the shift button and type as many times as necessary on the right arrow of the keyboard. Your tab changes in plain sight to take the desired shape!
- Do the same on the other side.
Step 2 – Customize Your Packaging
Now that the shape of your packaging is determined, it’s time to switch to filling! This is where you’ll appreciate the breadth of Adobe Illustrator’s features.
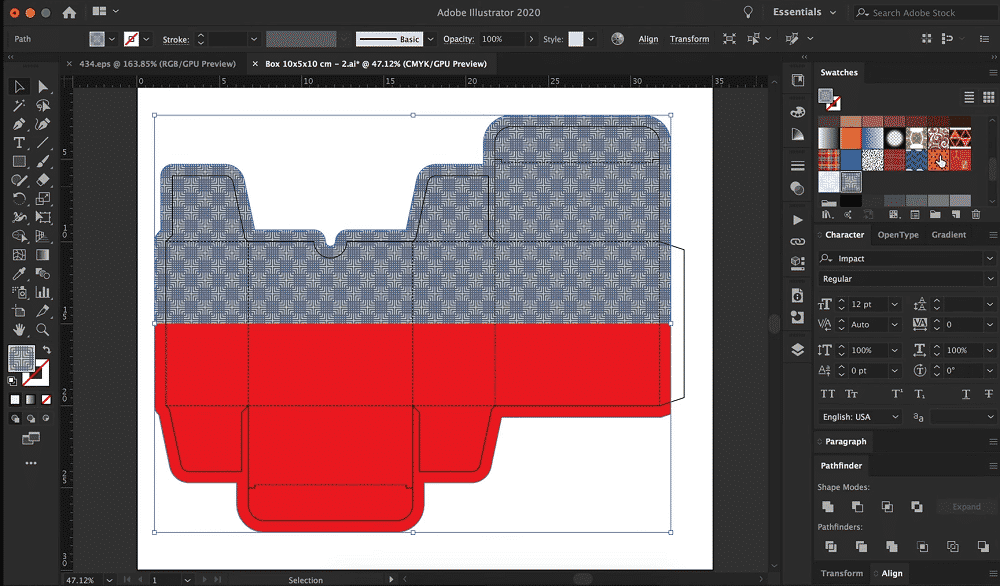
- Choose Colors
In the right toolbar, click the color chart to select your background. Don’t hesitate to use Pantone color chart references to ensure that the color return to print is optimal. Degraded effects are also possible. It’s up to you to play the shades on different faces!
- Drawing Tools
Beyond the rectangular or star shapes already defined, the Illustrator software offers you total creative freedom. Trace your vector drawings freehand with the “Brush” you’ll find in your left toolbar. You will be able to change the colour, size and even appearance of the line. In addition, the “Feather” tool will allow you to create an infinitely flexible curve ideal for developing a logo.
Tip: If drawing isn’t your forte, just add nice photographs.
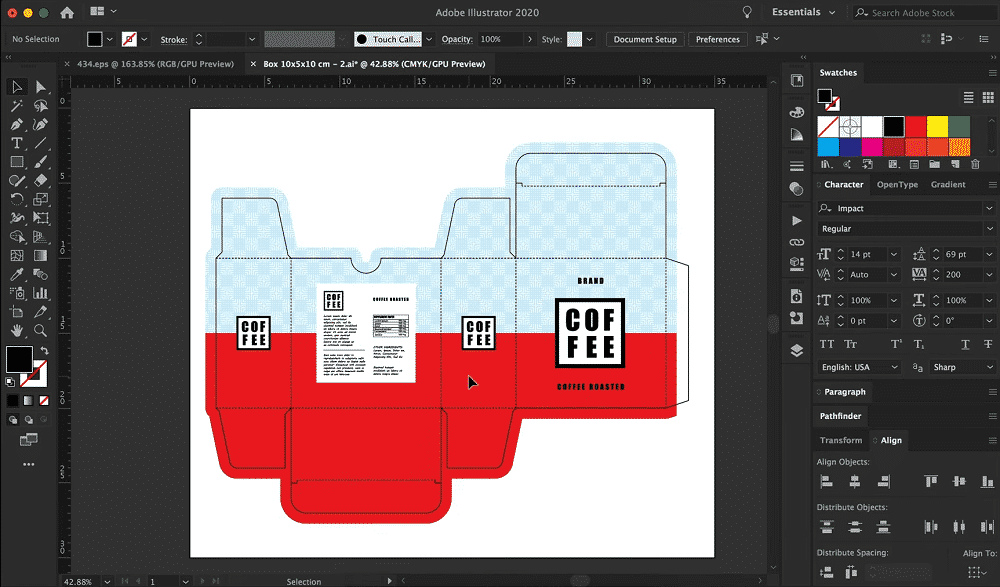
- Add Texts
Powerfully convey your message with perfectly adapted customizable texts. Beyond style, font and size, you will shape the shape of the letters and arrange them according to your desires. A wide range of options to offer your consumers consistent, attractive packaging and clear information.
In addition, many forums and tutorials will allow you to explore in detail the different ways to get the rendering you hope for. Note that Illustrator allows you to build a 3D model for a perspective at one or more escape points.
Step 3 – Prepare Your Packaging Box Design for Printing
You’ve just created your packaging on Illustrator. Before handing over your project to the printer, you will take care to provide all the necessary indications to know:
- Die Cut Shape: This is the overall shape of your document, which does not take into account folding or otherwise.
- Protection Zone: Either the area beyond which the text must not overflow. “Object” “Trace” “Shift” and you will enter a lower lag between -3 and -5 mm.
- Folding Indications: Usually shown using dotted line.
- Collage Indications: Usually represented by hatches. “Window” “Nuance Libraries” “Patterns” “Basic Texture Chart”
All you have to do is save it in 300 DPI and send it to your printer.

Top 10 Creative Cosmetic Packaging Design Ideas & illustrations 2023 | Luxury-Paper-Box.Com

10 Customs Of The Spring Festival (Lunar New Year) You Need To Know
Top 10 Best Lattafa Perfumes for Women & Men in 2024
Top 10 Best Packaging Design Software 2023 (Free & Paid)


Best Chocolate Packaging Designs of 2025
Natural Concept Perfume Design Ideas: Tell Your Brand Story